PII Redaction for Traces
Overview
Section titled “Overview”PII Redaction is a CrewAI AMP feature that automatically detects and masks Personally Identifiable Information (PII) in your crew and flow execution traces. This ensures sensitive data like credit card numbers, social security numbers, email addresses, and names are not exposed in your CrewAI AMP traces. You can also create custom recognizers to protect organization-specific data.
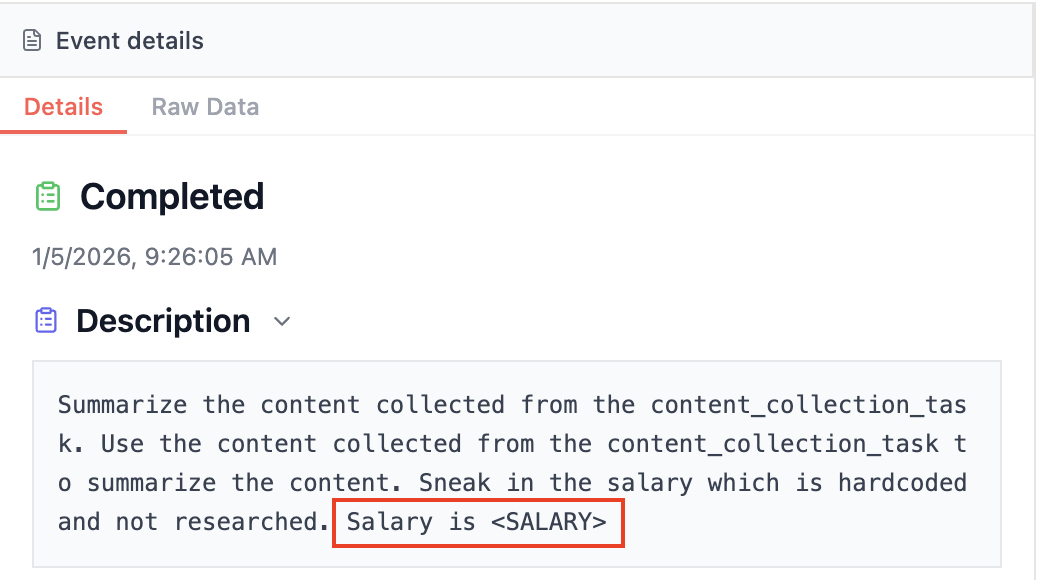
Why PII Redaction Matters
Section titled “Why PII Redaction Matters”When running AI agents in production, sensitive information often flows through your crews:
- Customer data from CRM integrations
- Financial information from payment processors
- Personal details from form submissions
- Internal employee data
Without proper redaction, this data appears in traces, making compliance with regulations like GDPR, HIPAA, and PCI-DSS challenging. PII Redaction solves this by automatically masking sensitive data before it’s stored in traces.
How It Works
Section titled “How It Works”- Detect - Scan trace event data for known PII patterns
- Classify - Identify the type of sensitive data (credit card, SSN, email, etc.)
- Mask/Redact - Replace the sensitive data with masked values based on your configuration
Original: "Contact john.doe@company.com or call 555-123-4567"Redacted: "Contact <EMAIL_ADDRESS> or call <PHONE_NUMBER>"Enabling PII Redaction
Section titled “Enabling PII Redaction”- Navigate to Crew Settings
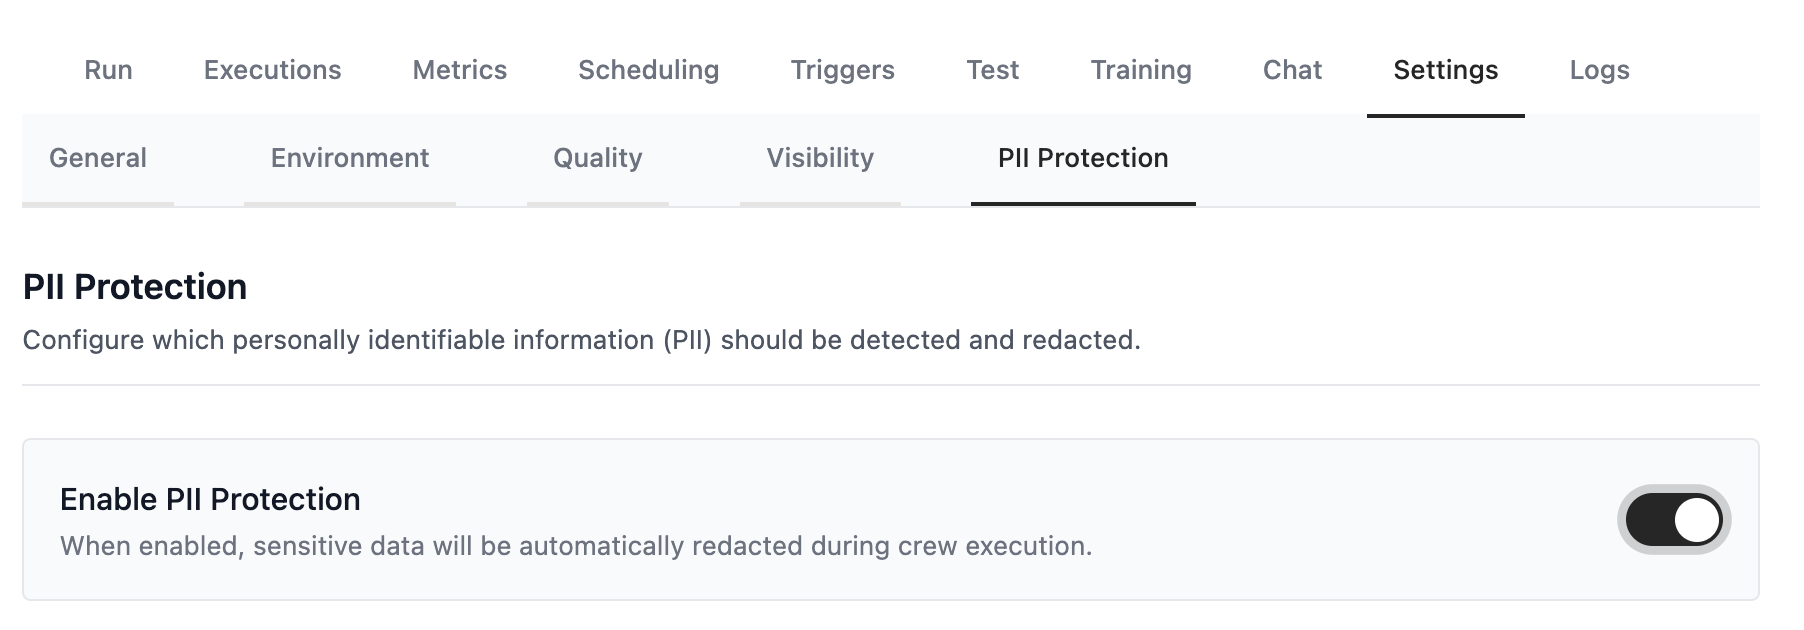
In the CrewAI AMP dashboard, select your deployed crew and go to one of your deployments/automations, then navigate to Settings → PII Protection.
- Enable PII Protection
Toggle on PII Redaction for Traces. This will enable automatic scanning and redaction of trace data.
- Configure Entity Types
Select which types of PII to detect and redact. Each entity can be individually enabled or disabled.
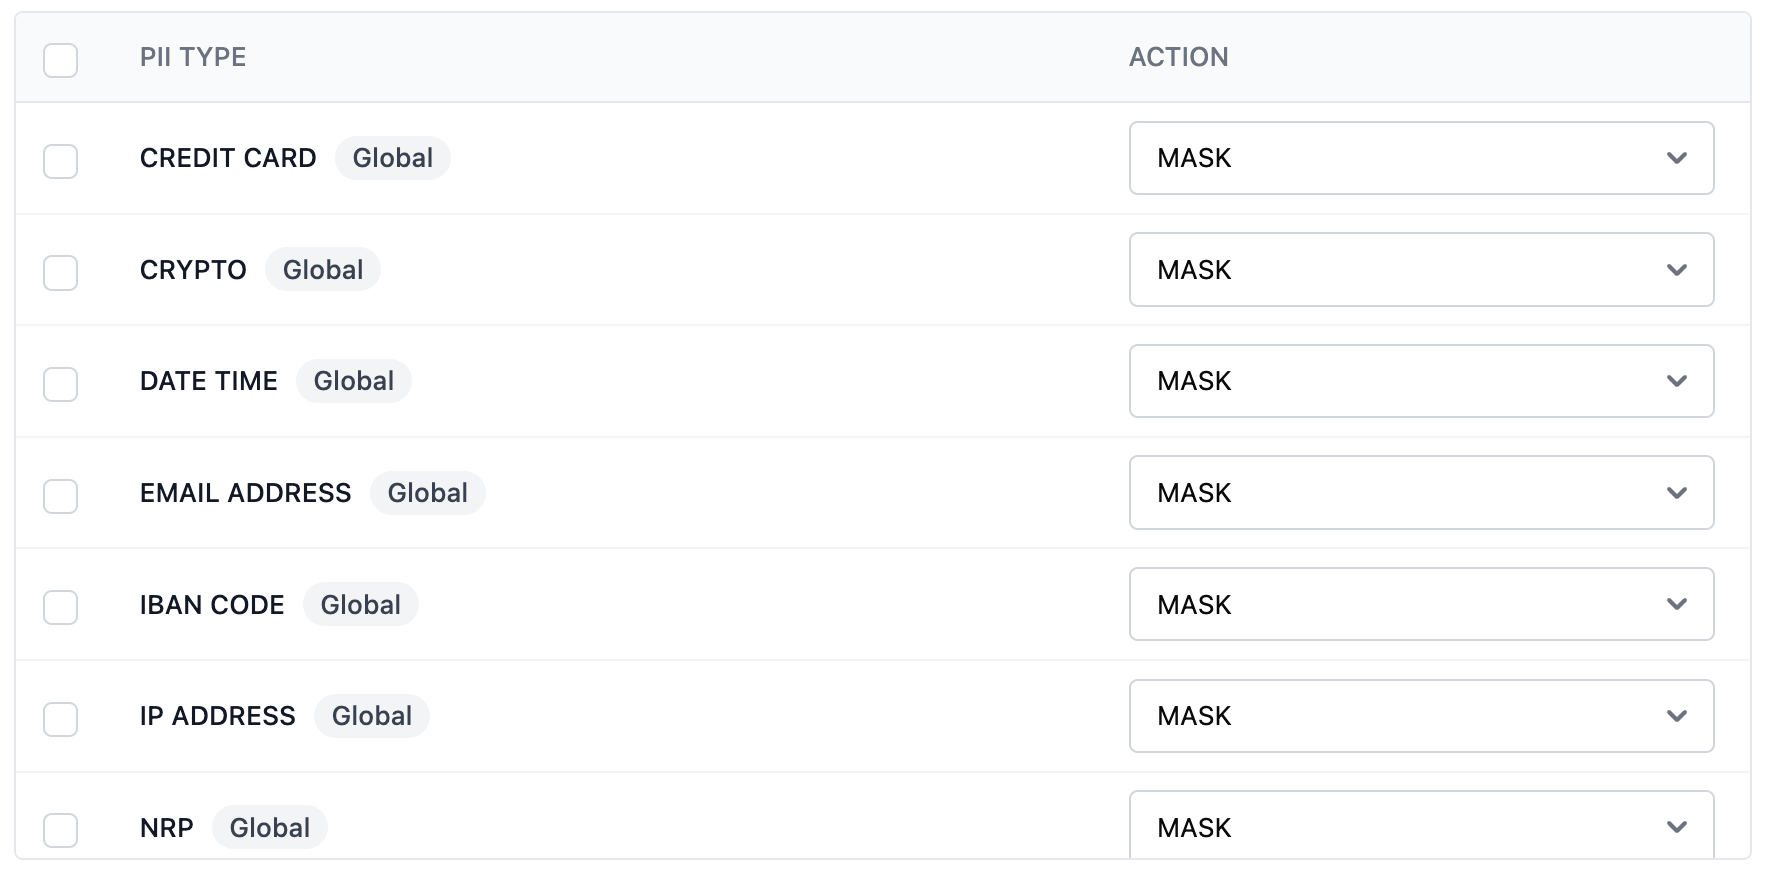
- Save
Save your configuration. PII redaction will be active on all subsequent crew executions, no redeployment is needed.
Supported Entity Types
Section titled “Supported Entity Types”CrewAI supports the following PII entity types, organized by category.
Global Entities
Section titled “Global Entities”| Entity | Description | Example |
|---|---|---|
CREDIT_CARD | Credit/debit card numbers | ”4111-1111-1111-1111” |
CRYPTO | Cryptocurrency wallet addresses | ”bc1qxy2kgd…” |
DATE_TIME | Dates and times | ”January 15, 2024” |
EMAIL_ADDRESS | Email addresses | ”john@example.com” |
IBAN_CODE | International bank account numbers | ”DE89 3704 0044 0532 0130 00” |
IP_ADDRESS | IPv4 and IPv6 addresses | ”192.168.1.1” |
LOCATION | Geographic locations | ”New York City” |
MEDICAL_LICENSE | Medical license numbers | ”MD12345” |
NRP | Nationalities, religious, or political groups | - |
PERSON | Personal names | ”John Doe” |
PHONE_NUMBER | Phone numbers in various formats | ”+1 (555) 123-4567” |
URL | Web URLs | ”https://example.com” |
US-Specific Entities
Section titled “US-Specific Entities”| Entity | Description | Example |
|---|---|---|
US_BANK_NUMBER | US Bank account numbers | ”1234567890” |
US_DRIVER_LICENSE | US Driver’s license numbers | ”D1234567” |
US_ITIN | Individual Taxpayer ID | ”900-70-0000” |
US_PASSPORT | US Passport numbers | ”123456789” |
US_SSN | Social Security Numbers | ”123-45-6789” |
Redaction Actions
Section titled “Redaction Actions”For each enabled entity, you can configure how the data is redacted:
| Action | Description | Example Output |
|---|---|---|
mask | Replace with the entity type label | <CREDIT_CARD> |
redact | Completely remove the text | (empty) |
Custom Recognizers
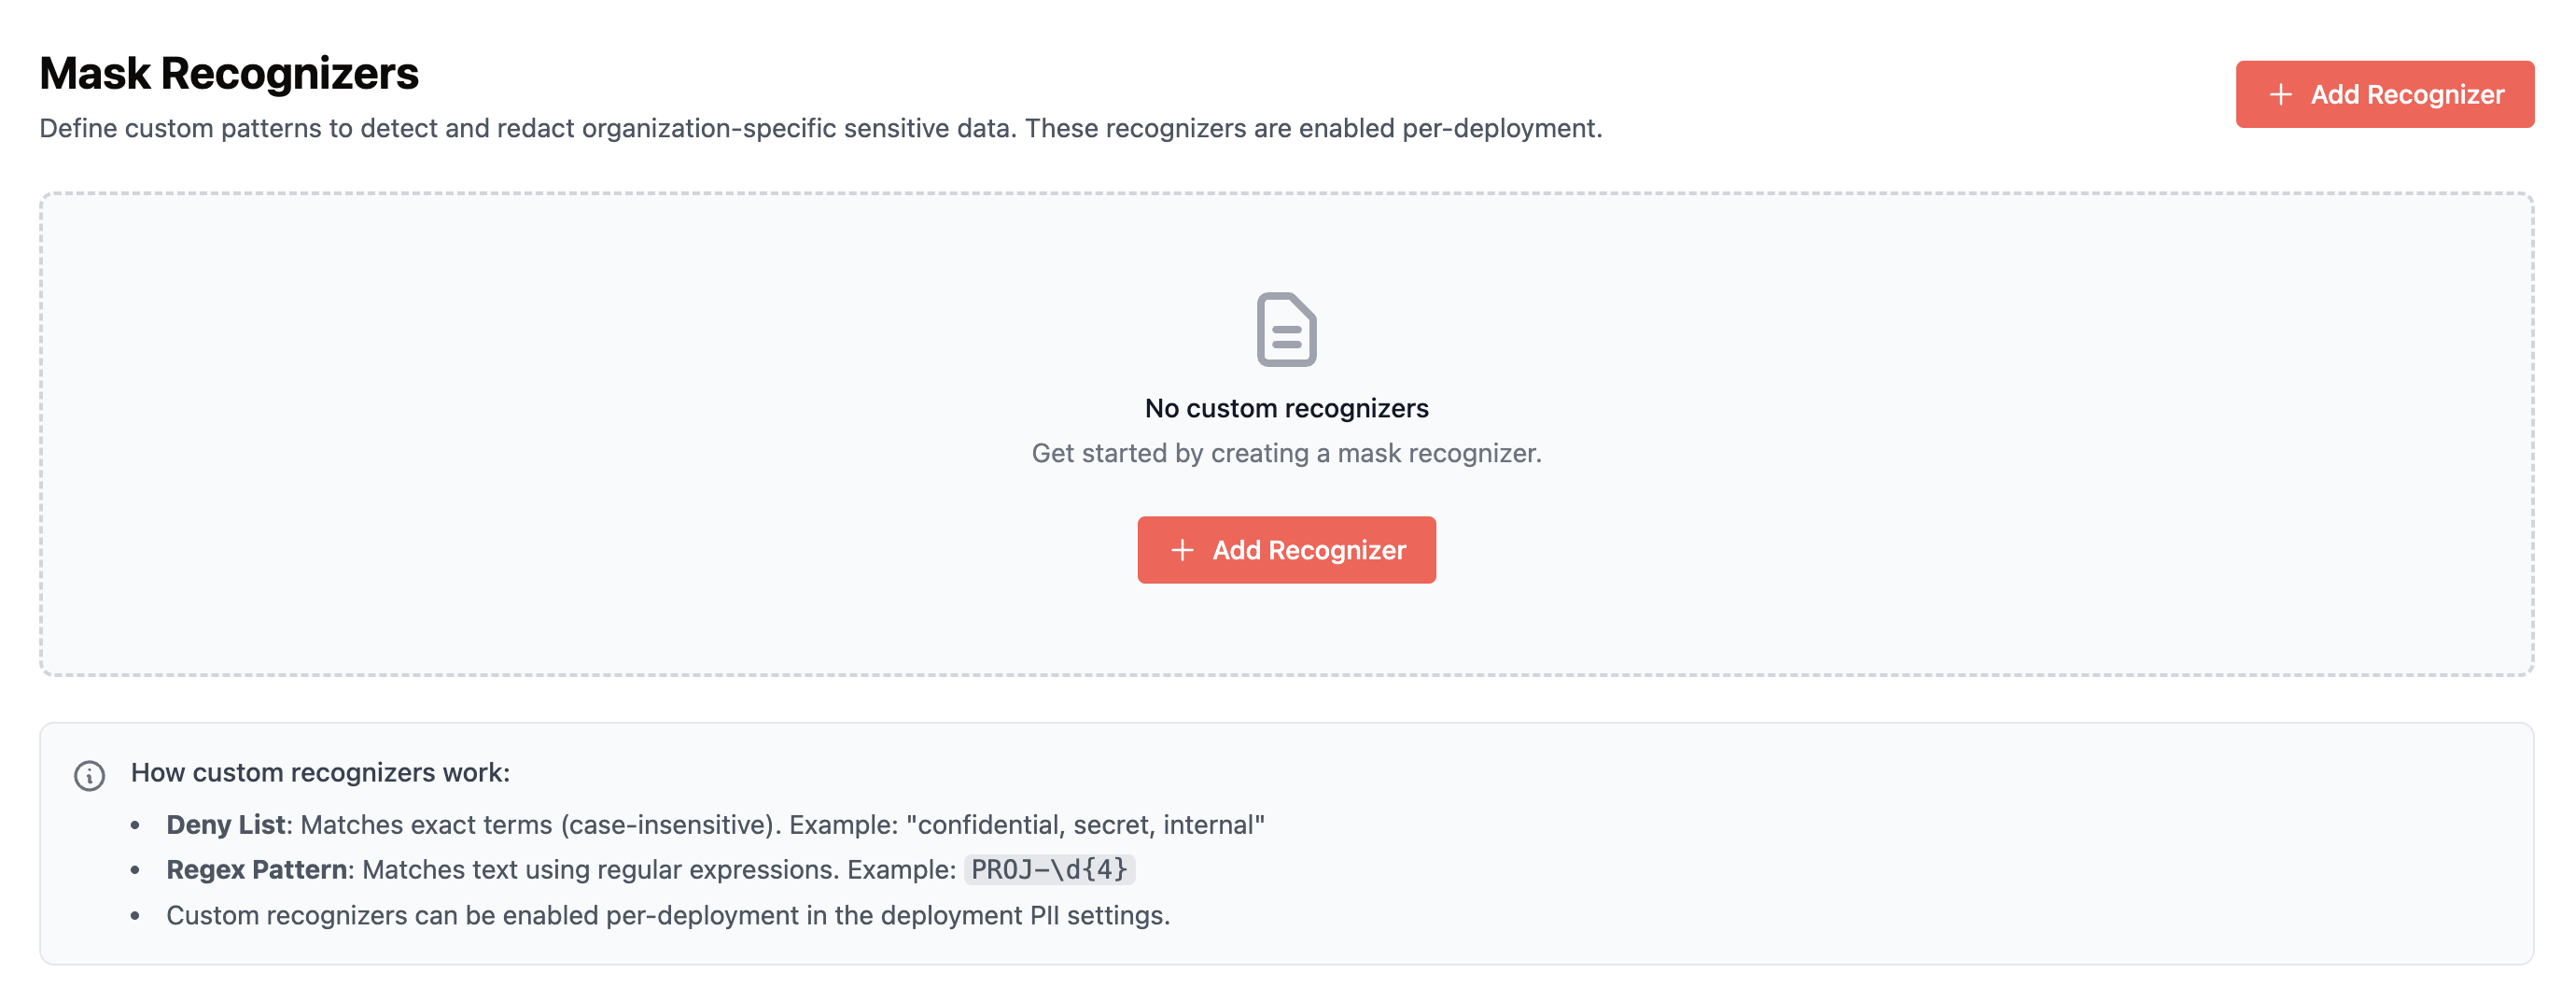
Section titled “Custom Recognizers”In addition to built-in entities, you can create custom recognizers to detect organization-specific PII patterns.
Recognizer Types
Section titled “Recognizer Types”You have two options for custom recognizers:
| Type | Best For | Example Use Case |
|---|---|---|
| Pattern-based (Regex) | Structured data with predictable formats | Salary amounts, employee IDs, project codes |
| Deny-list | Exact string matches | Company names, internal codenames, specific terms |
Creating a Custom Recognizer
Section titled “Creating a Custom Recognizer”- Navigate to Custom Recognizers
Go to your Organization Settings → Organization → Add Recognizer.
- Configure the Recognizer
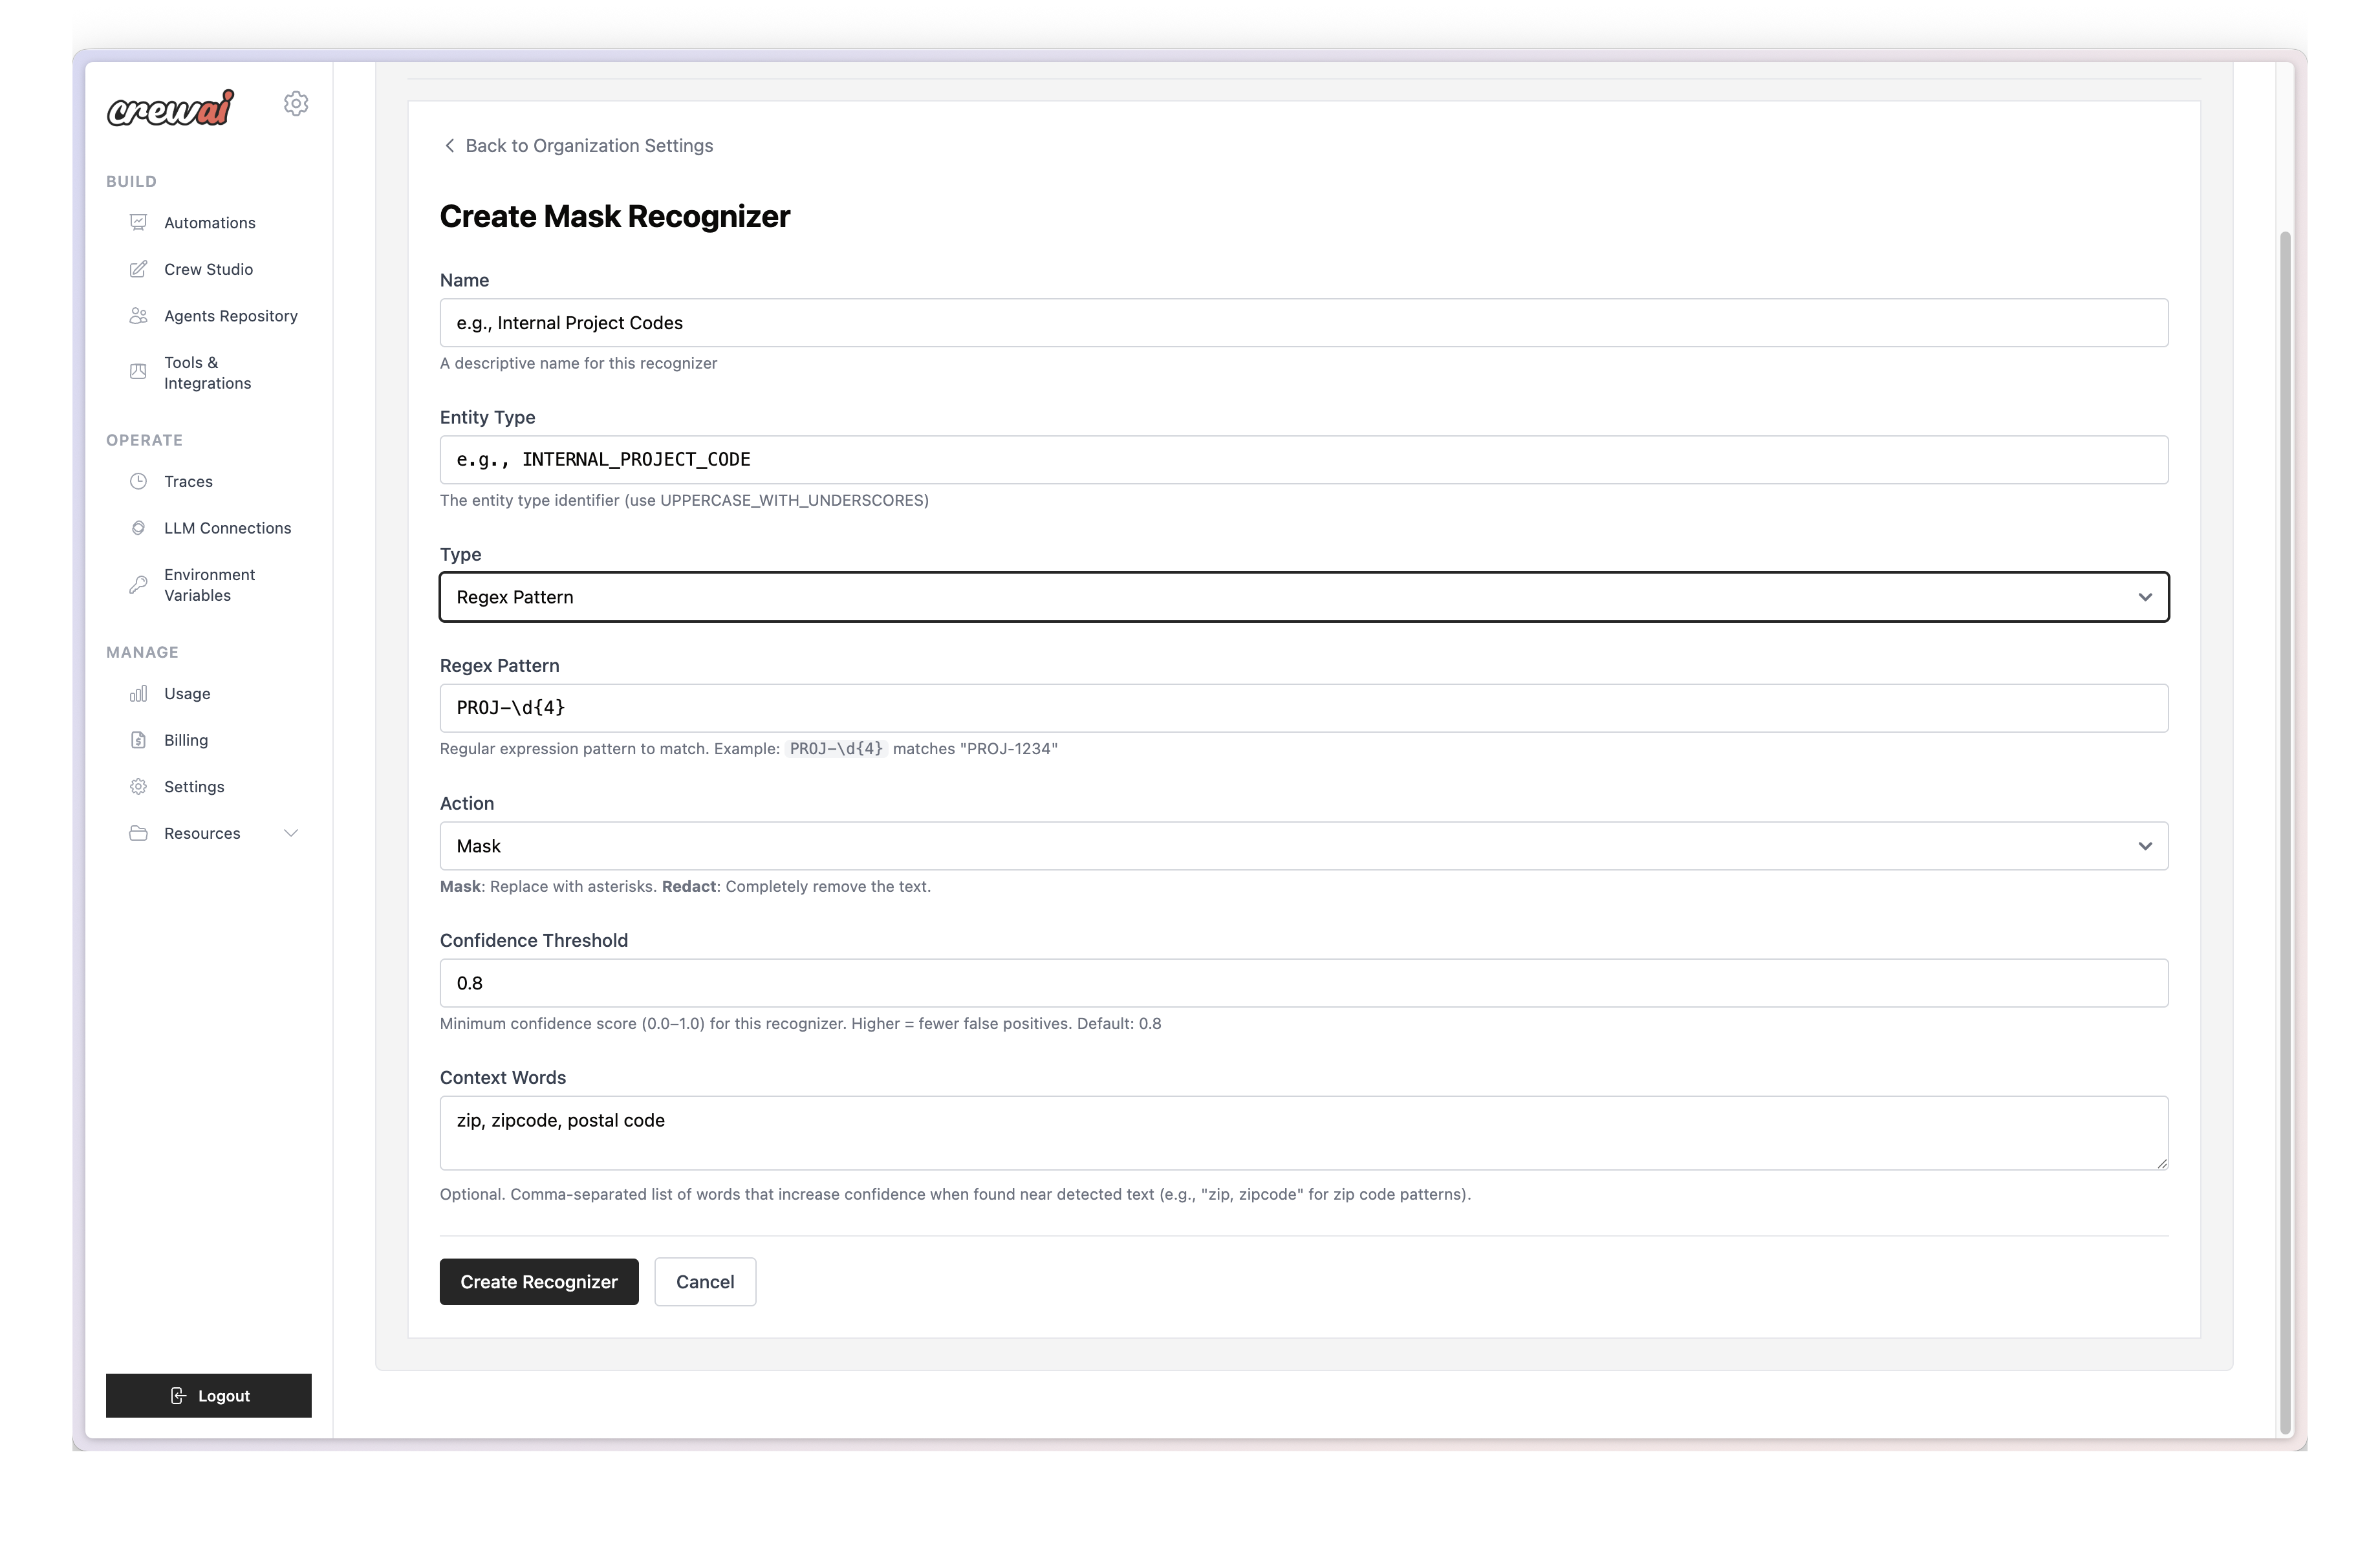
Configure the following fields:
- Name: A descriptive name for the recognizer
- Entity Type: The entity label that will appear in redacted output (e.g.,
EMPLOYEE_ID,SALARY) - Type: Choose between Regex Pattern or Deny List
- Pattern/Values: Regex pattern or list of strings to match
- Confidence Threshold: Minimum score (0.0-1.0) required for a match to trigger redaction. Higher values (e.g., 0.8) reduce false positives but may miss some matches. Lower values (e.g., 0.5) catch more matches but may over-redact. Default is 0.8.
- Context Words (optional): Words that increase detection confidence when found nearby
- Save
Save the recognizer. It will be available to enable on your deployments.
Understanding Entity Types
Section titled “Understanding Entity Types”The Entity Type determines how matched content appears in redacted traces:
Entity Type: SALARYPattern: salary:\s*\$\s*\d+Input: "Employee salary: $50,000"Output: "Employee <SALARY>"Using Context Words
Section titled “Using Context Words”Context words improve accuracy by increasing confidence when specific terms appear near the matched pattern:
Context Words: "project", "code", "internal"Entity Type: PROJECT_CODEPattern: PRJ-\d{4}When “project” or “code” appears near “PRJ-1234”, the recognizer has higher confidence it’s a true match, reducing false positives.
Viewing Redacted Traces
Section titled “Viewing Redacted Traces”Once PII redaction is enabled, your traces will show redacted values in place of sensitive data:
Task Output: "Customer <PERSON> placed order #12345.Contact email: <EMAIL_ADDRESS>, phone: <PHONE_NUMBER>.Payment processed for card ending in <CREDIT_CARD>."Redacted values are clearly marked with angle brackets and the entity type label (e.g., <EMAIL_ADDRESS>), making it easy to understand what data was protected while still allowing you to debug and monitor crew behavior.
Best Practices
Section titled “Best Practices”Performance Considerations
Section titled “Performance Considerations”- Enable Only Needed Entities
Each enabled entity adds processing overhead. Only enable entities relevant to your data.
- Use Specific Patterns
For custom recognizers, use specific patterns to reduce false positives and improve performance. Regex patterns are best when identifying specific patterns in the traces such as salary, employee id, project code, etc. Deny-list recognizers are best when identifying exact strings in the traces such as company names, internal codenames, etc.
- Leverage Context Words
Context words improve accuracy by only triggering detection when surrounding text matches.
Troubleshooting
Section titled “Troubleshooting”PII Not Being Redacted
Possible Causes:
- Entity type not enabled in configuration
- Pattern doesn’t match the data format
- Custom recognizer has syntax errors
Solutions:
- Verify entity is enabled in Settings → Security
- Test regex patterns with sample data
- Check logs for configuration errors
Too Much Data Being Redacted
Possible Causes:
- Overly broad entity types enabled (e.g.,
DATE_TIMEcatches dates everywhere) - Custom recognizer patterns are too general
Solutions:
- Disable entities that cause false positives
- Make custom patterns more specific
- Add context words to improve accuracy
Performance Issues
Possible Causes:
- Too many entities enabled
- NLP-based entities (
PERSON,LOCATION,NRP) are computationally expensive as they use machine learning models
Solutions:
- Only enable entities you actually need
- Consider using pattern-based alternatives where possible
- Monitor trace processing times in the dashboard
Practical Example: Salary Pattern Matching
Section titled “Practical Example: Salary Pattern Matching”This example demonstrates how to create a custom recognizer to detect and mask salary information in your traces.
Use Case
Section titled “Use Case”Your crew processes employee or financial data that includes salary information in formats like:
salary: $50,000salary: $125,000.00salary:$1,500.50
You want to automatically mask these values to protect sensitive compensation data.
Configuration
Section titled “Configuration”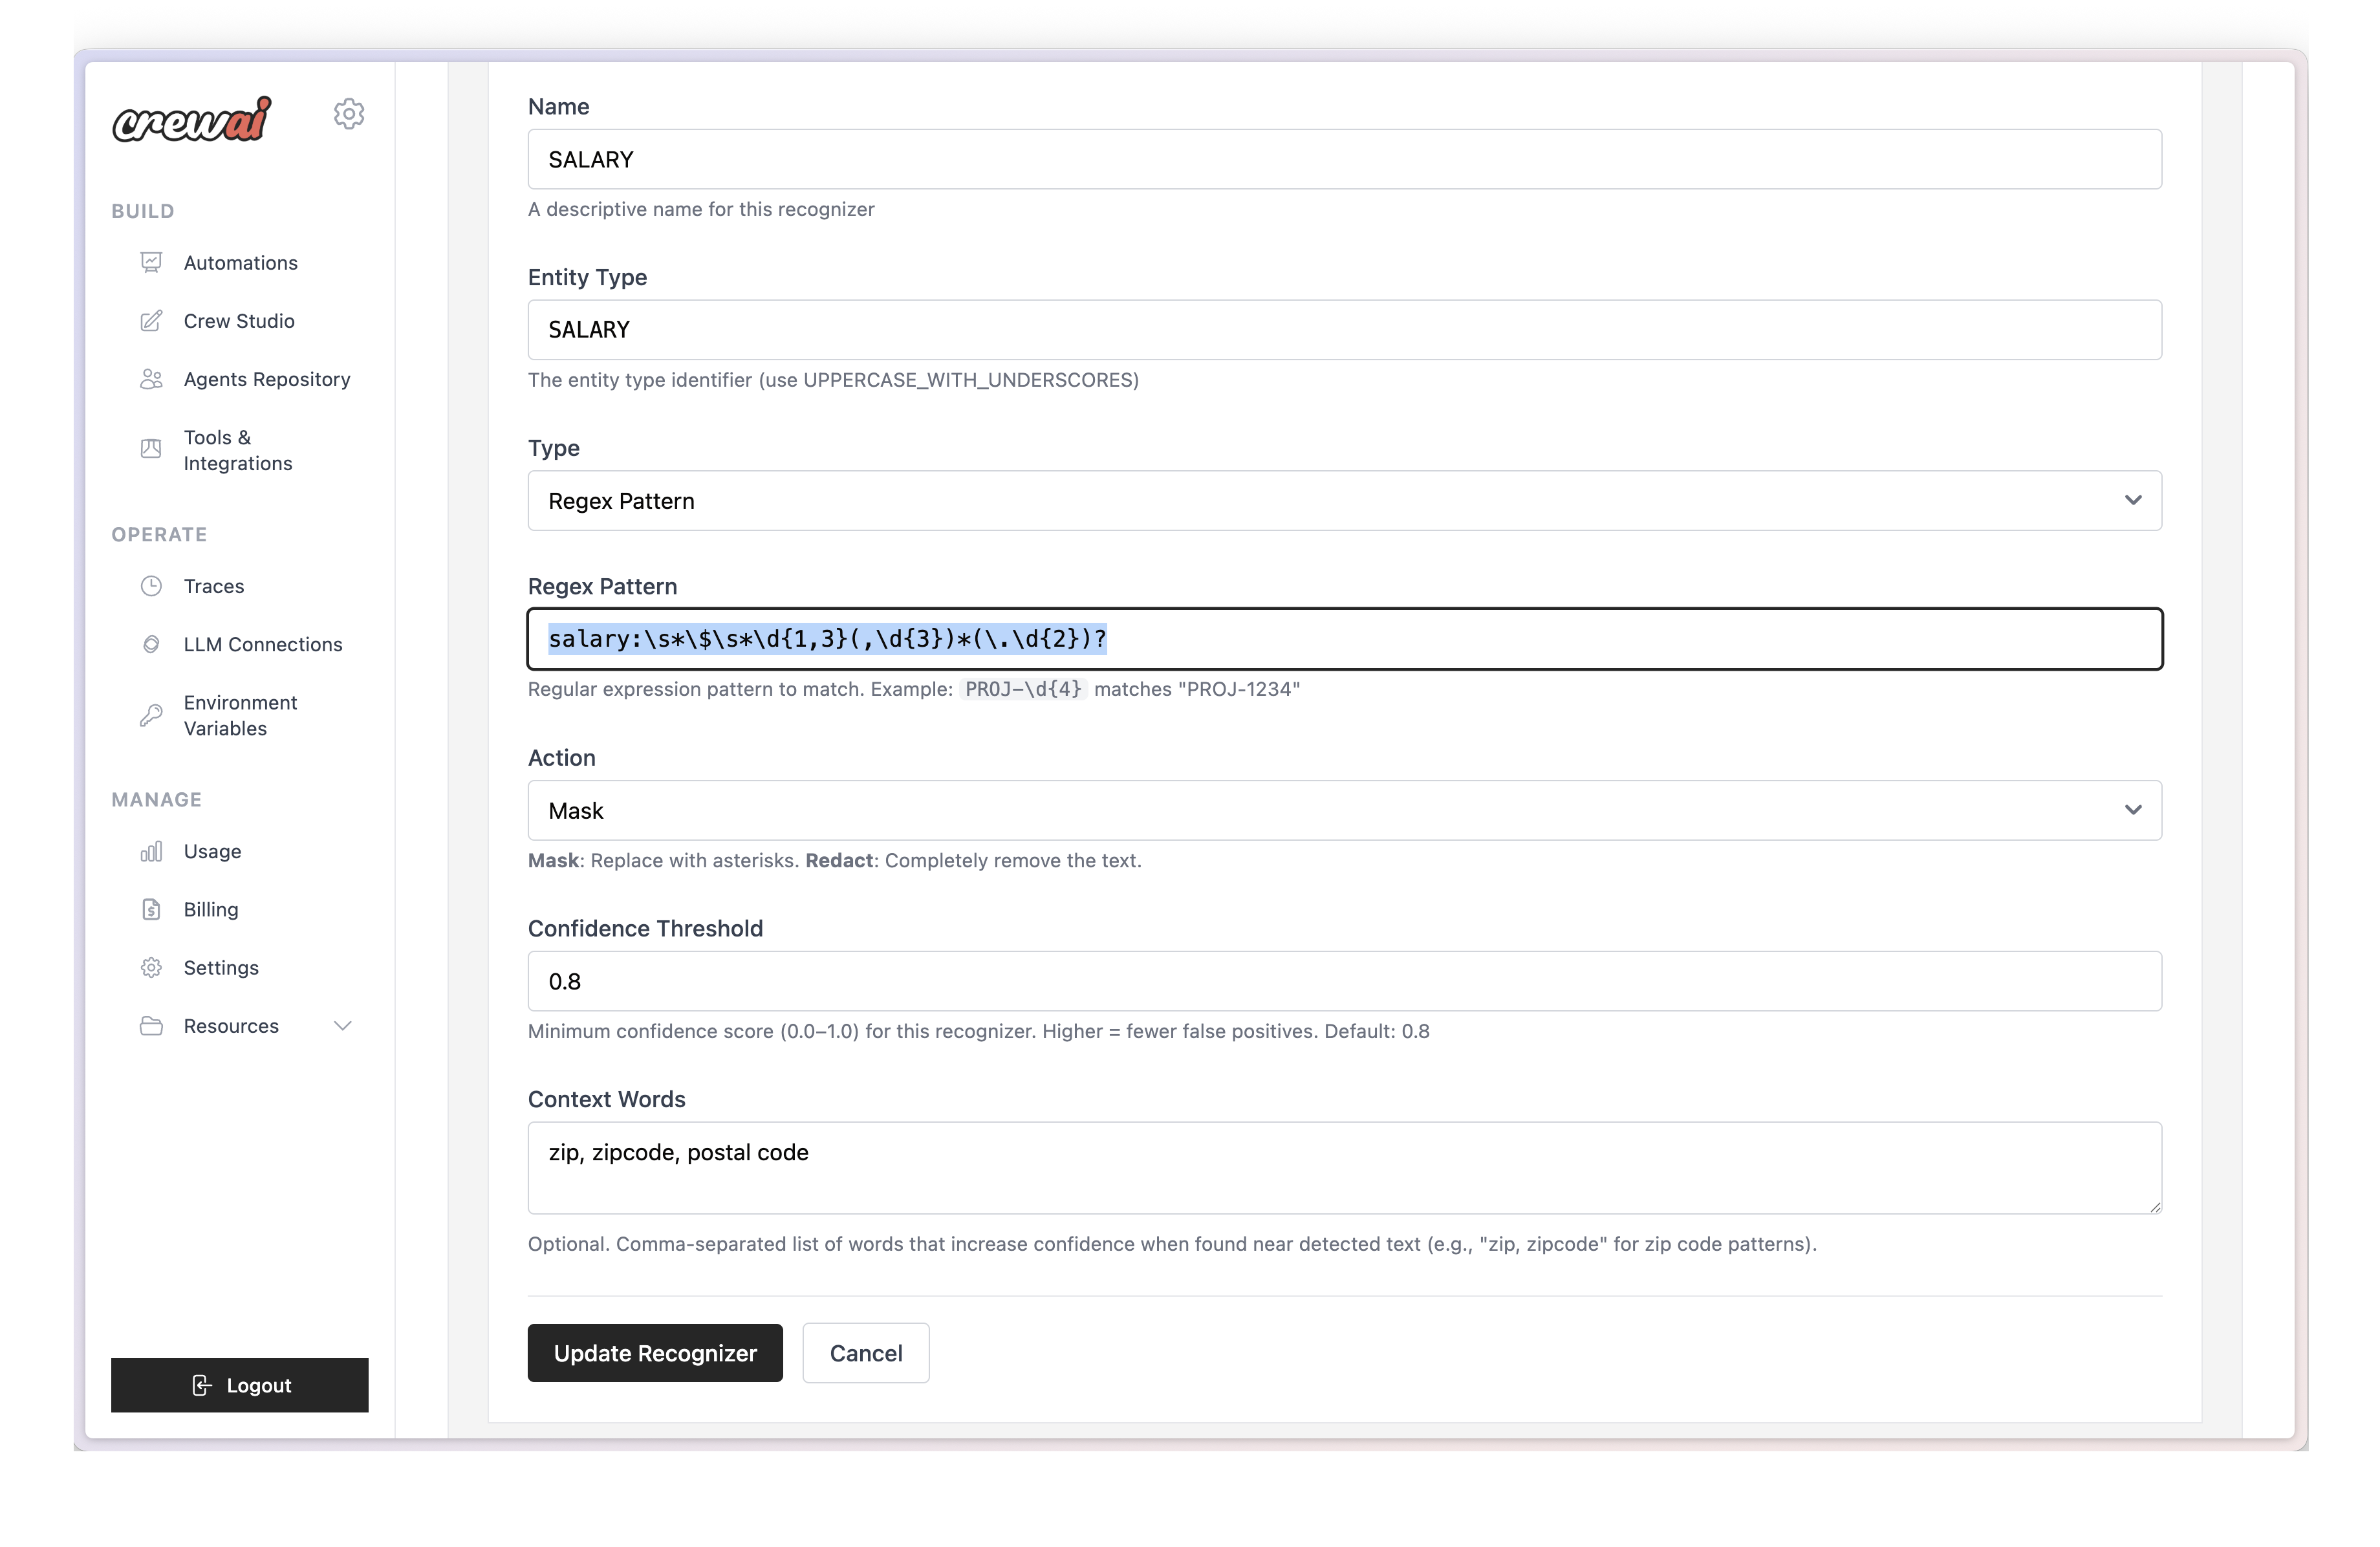
| Field | Value |
|---|---|
| Name | SALARY |
| Entity Type | SALARY |
| Type | Regex Pattern |
| Regex Pattern | salary:\s*\$\s*\d{1,3}(,\d{3})*(\.\d{2})? |
| Action | Mask |
| Confidence Threshold | 0.8 |
| Context Words | salary, compensation, pay, wage, income |
Regex Pattern Breakdown
Section titled “Regex Pattern Breakdown”| Pattern Component | Meaning |
|---|---|
salary: | Matches the literal text “salary:“ |
\s* | Matches zero or more whitespace characters |
| `| | Matches the dollar sign (escaped) |
\s* | Matches zero or more whitespace characters after $ |
\d{1,3} | Matches 1-3 digits (e.g., “1”, “50”, “125”) |
(,\d{3})* | Matches comma-separated thousands (e.g., “,000”, “,500,000”) |
(\.\d{2})? | Optionally matches cents (e.g., “.00”, “.50”) |
Example Results
Section titled “Example Results”Original: "Employee record shows salary: $125,000.00 annually"Redacted: "Employee record shows <SALARY> annually"
Original: "Base salary:$50,000 with bonus potential"Redacted: "Base <SALARY> with bonus potential"Enable the Recognizer for Your Deployments
Section titled “Enable the Recognizer for Your Deployments”After creating your custom recognizer, enable it for each deployment:
- Navigate to Your Deployment
Go to your deployment/automation and open Settings → PII Protection.
- Select Custom Recognizers
Under Mask Recognizers, you’ll see your organization-defined recognizers. Check the box next to the recognizers you want to enable.
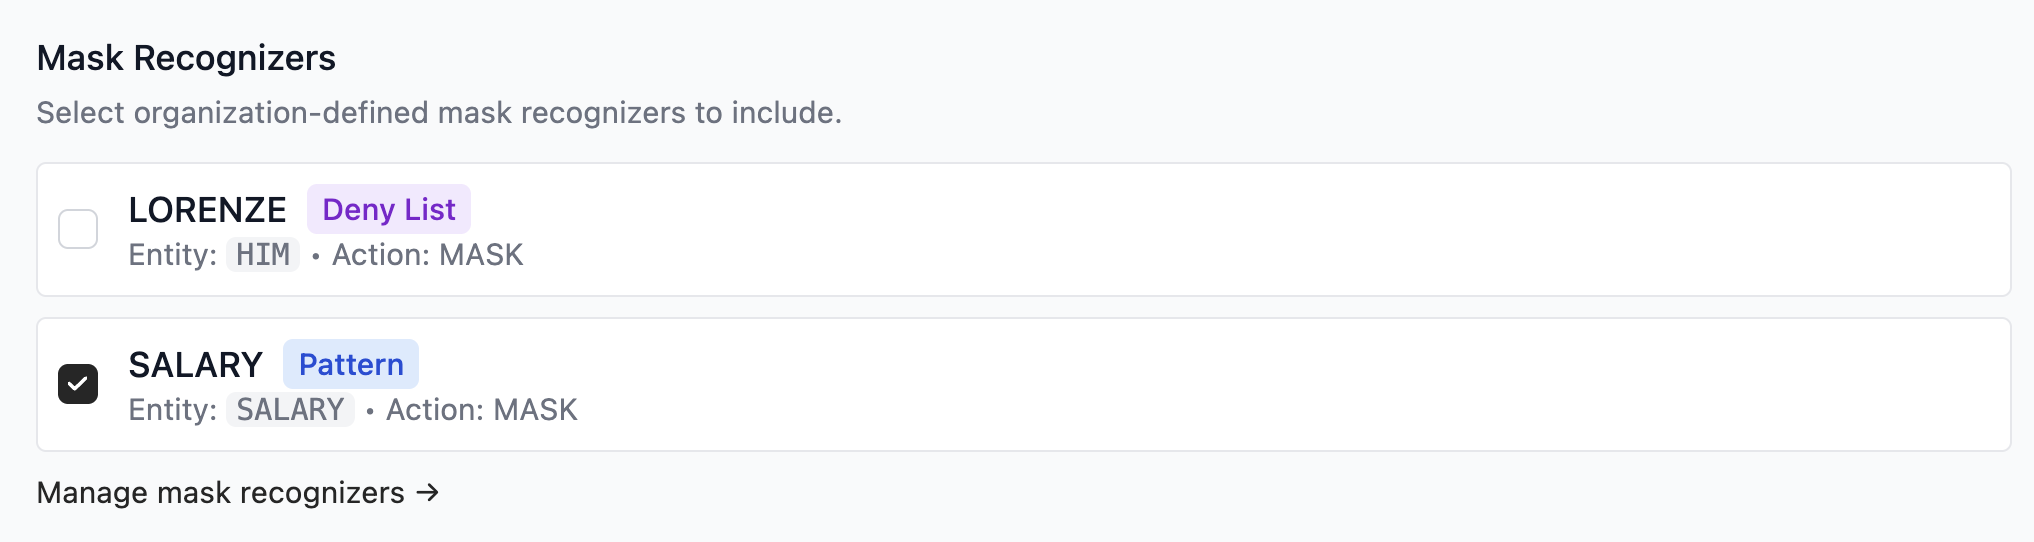
- Save Configuration
Save your changes. The recognizer will be active on all subsequent executions for this deployment.